Sorry, your cart is empty :(
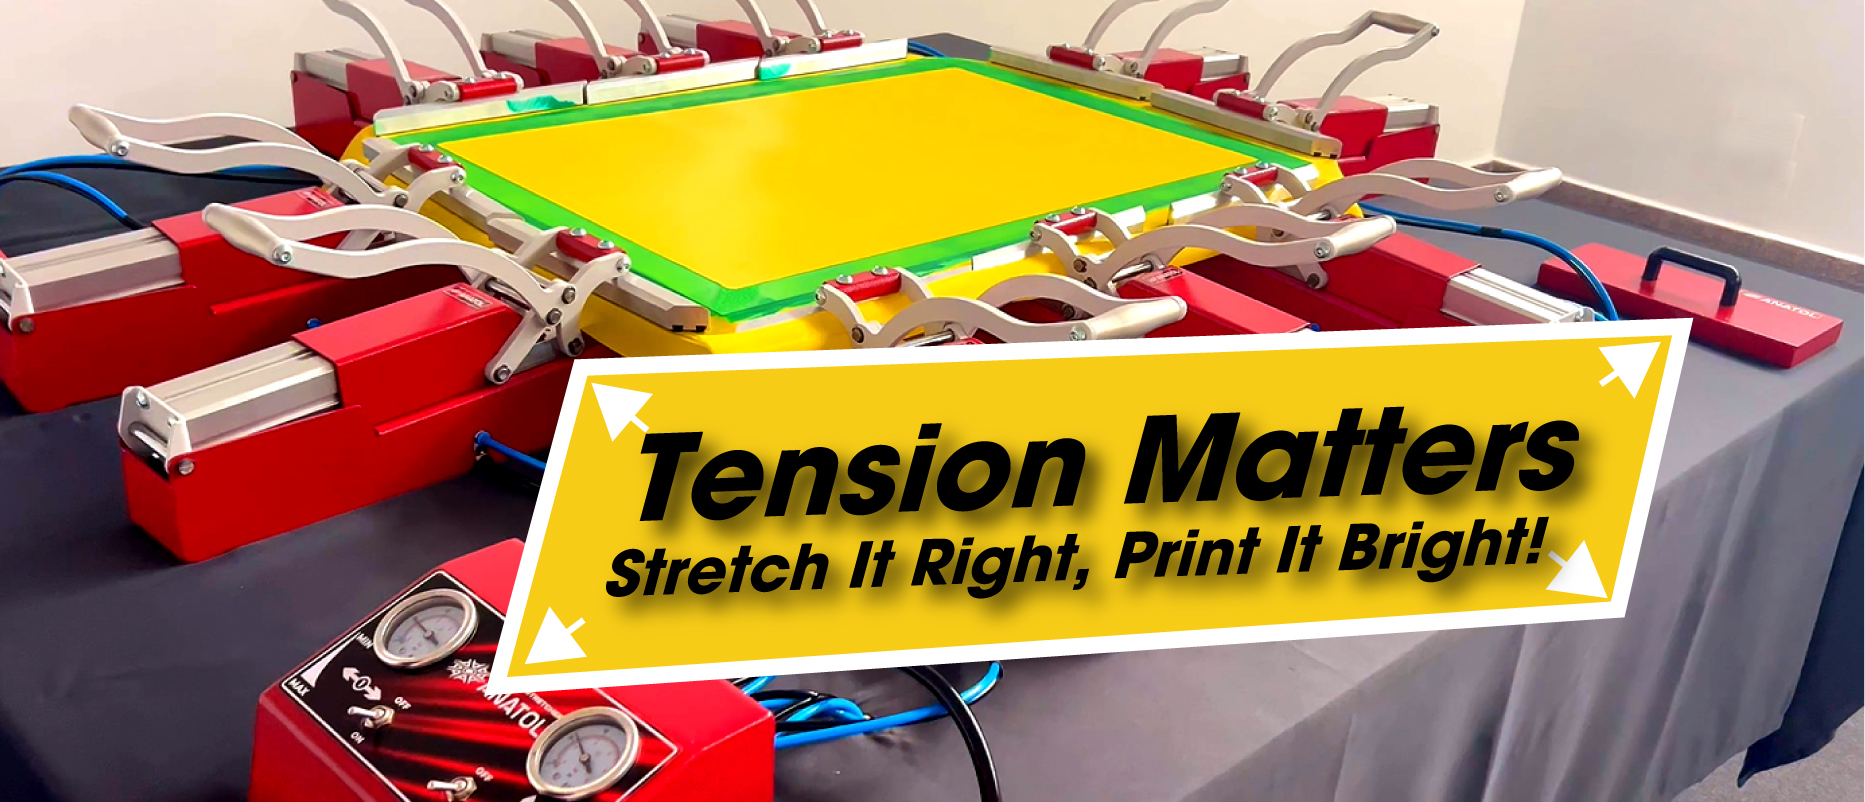
How Proper Mesh Tension Transforms Print Quality, Speed, and Consistency — And How Anatol Stretchers Help You Achieve It
In screen printing, few factors influence print quality and production speed as much as screen tension. High, consistent mesh tension ensures fast snap-off, clean ink release, sharp details, and smooth flooding. Low tension, on the other hand, slows production, causes smearing, uneven ink deposits, and leads to rapid stencil and mesh wear.
This guide breaks down why screen tension matters, explains the mechanics behind efficient printing, and provides a step-by-step tutorial on using an Anatol pneumatic screen stretcher — one of the most reliable tools for achieving high-tension, production-ready screens.
Perfect for:
✔ Screen print shops upgrading to higher speed
✔ Printers adopting automatic presses
✔ Shops struggling with smearing, slow peel, or inconsistent ink deposit
✔ Anyone aiming for sharper detail and faster throughput
Why Screen Tension Matters in Screen Printing
Ink Transfer Mechanics: Why Screen Printing Is Different
In printing methods like flexography or lithography, ink transfers from rigid plates at high speed. In screen printing, however, the mesh is flexible — meaning it must move, stretch, and snap back with every stroke.
The pace of this snap-off (also called peel or release) is what ultimately limits print speed.
- If the mesh snaps quickly → fast production, clean prints
- If the mesh lags → smearing, blurred lines, ink buildup, slower cycles
This is where mesh tension becomes critical.
The Problems Caused by Low Screen Tension
Low tension (under 25 N) creates several limitations:
1. Slow Snap-Off / Peel
Thick or tacky inks — white, metallic, fluorescent, puff — act like glue.
At low tension, the mesh cannot overpower the tackiness fast enough.
Result:
❌ Smeeared prints
❌ Half-moon release pattern
❌ Squeegee outruns the mesh
2. Reduced Production Speed
On automatic presses, every head must wait for the mesh to peel before lifting.
This slows cycle time by 20–50%.
3. Inconsistent Ink Deposit During Flooding
At low tension, the mesh sags under the floodbar, causing:
- Overfilled centers
- Underfilled edges
- Pre-expressed ink (ink being pushed through unintentionally)
- Frequent screen cleaning
4. Higher Labor and Material Costs
Low tension forces printers to use:
- More squeegee pressure
- More off-contact
- Slower strokes
All of which accelerate wear on squeegees, meshes, and emulsion — adding cost and reducing print quality.
Why High Tension Changes Everything
High-tension screens (40–50 N and above) fundamentally improve the entire print process.
Benefits:
✔ Faster mesh snap-off
✔ Sharper details and cleaner edges
✔ More consistent ink distribution
✔ Less stencil wear
✔ Faster production cycles
✔ Reduced operator fatigue
✔ Superior performance with underbases and specialty inks
At around 50 N, many shops report up to 57% increase in hourly output.
At tensions approaching 80–100 N, performance increases even more dramatically.
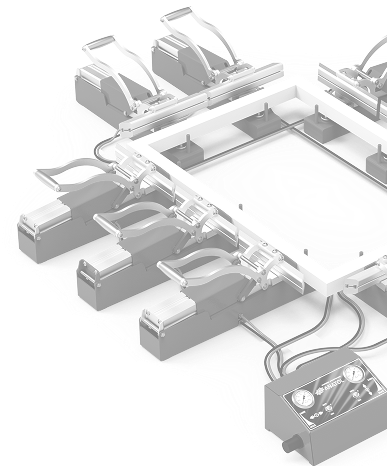
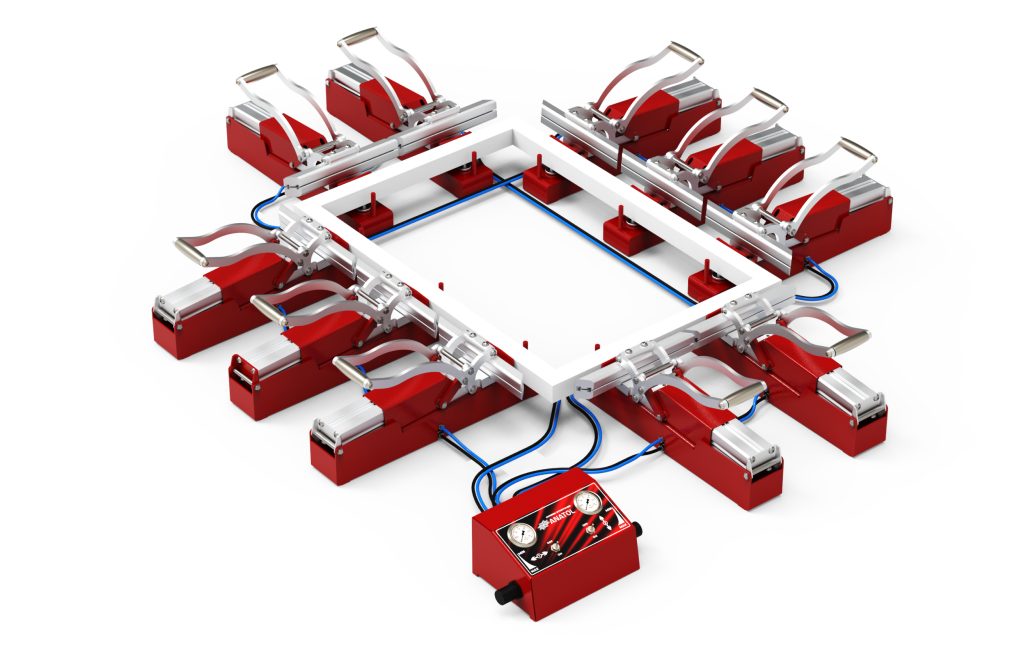
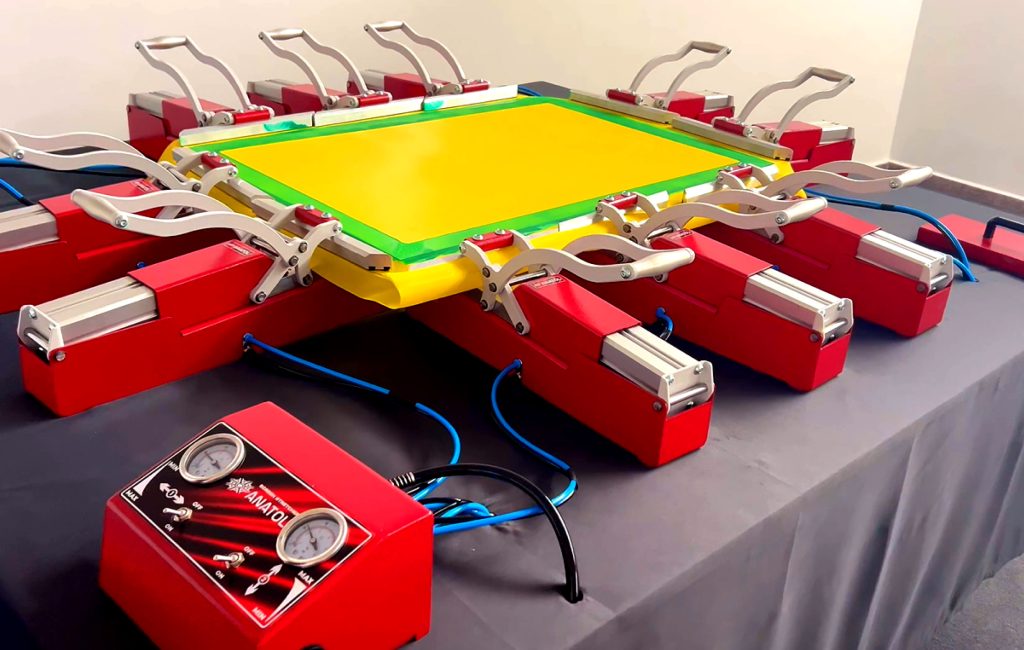
How to Achieve High, Stable Tension Using an Anatol Screen Stretcher
Anatol pneumatic stretchers are engineered to deliver repeatable, even tension across all frame sizes. Here’s how to use them properly.
Step-by-Step Guide: Using an Anatol Pneumatic Screen Stretcher
1. Setup Your Stretcher
- Place system on a stable table
- Connect to compressed air (approx. 100 PSI)
- Attach air lines from the control box to all clamps
Why this matters:
Stable air pressure = stable tension. Uneven pressure causes uneven stretch.
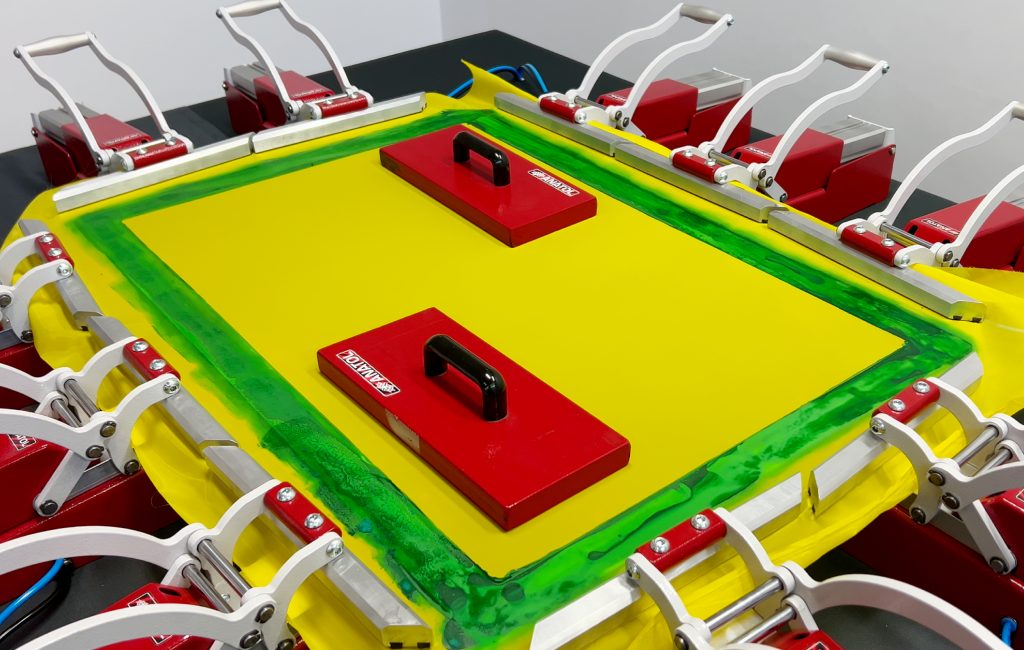
2. Position Mesh and Frame
- Lay mesh with 2–3 inches of extra material around all sides
- Place clamps evenly around the frame
- Ensure clamps sit flat and grip the mesh smoothly
Why this matters:
Clamp spacing determines force distribution. Uneven spacing causes uneven peel and tension loss during printing.

3. Pre-Tension (Warp & Weft Control)
Use the Anatol control box to adjust both mesh directions independently.
Start with:
- Moderate pressure
- Equal values across all sides
Why this matters:
Balanced pre-tension prevents distortion and prepares the mesh for high tension without tearing.
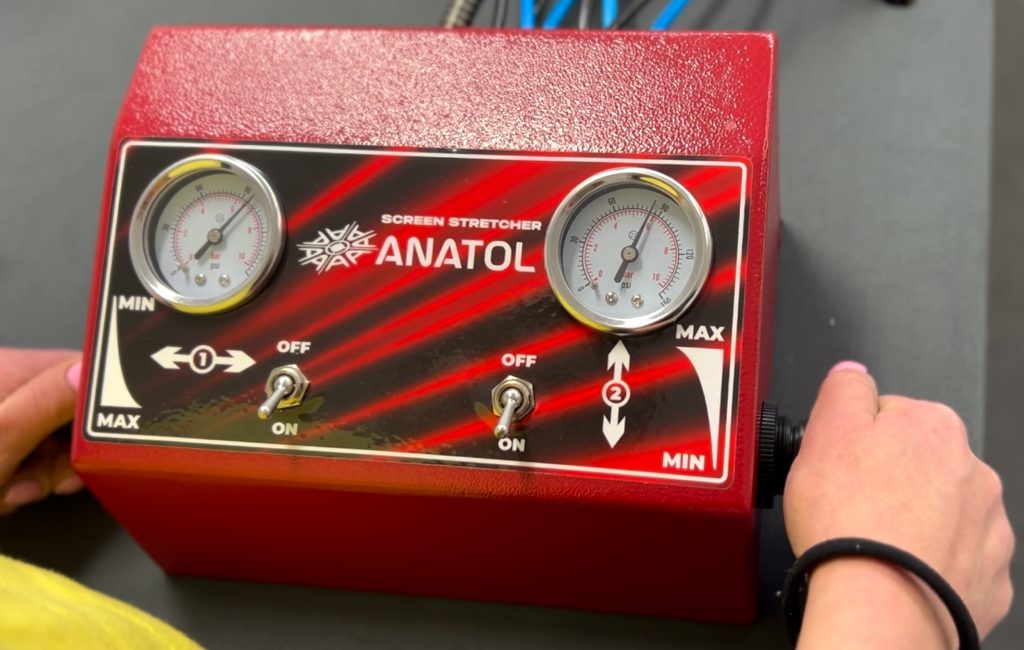
4. Begin Stretching
Activate pneumatic pulling.
Watch the tension meter as the mesh tightens.
Recommended stages:
- 20–30 N: Initial stretch
- 35–45 N: Operational tension for standard printing
- 50–70 N: High-performance tension
- 70–100 N: For maximum speed and detail
Why this matters:
High tension ensures instantaneous snap-off, consistent flooding, and clean prints even with thick ink deposits.
5. Let the Mesh Relax, Then Restretch
Mesh naturally relaxes after stretching.
Professional process:
- Stretch to target
- Hold for 1–3 minutes
- Release slightly
- Stretch again to final tension
Why this matters:
This creates long-term tension stability — screens won’t lose tension on press.
6. Apply Adhesive While Maintaining Tension
Secure mesh to frame using glue while clamps remain engaged.
Allow glue to cure fully before releasing pressure.
Why this matters:
If glue cures during tension drop, your screen will instantly lose 2–5 N — enough to affect print speed and quality.
7. Release Clamps Slowly
Gradually reduce air pressure to avoid shock relaxation.
Remove clamps carefully.
8. Verify Final Tension
Use a tension meter to confirm:
- Uniformity in warp/weft
- Corners are within ±1–2 N of center
- Final target tension is achieved
Here’s a video that walks you through the entire stretching process—from positioning the frame and aligning the clamps to reaching and locking in optimal tension—so you can follow along visually as you set up your screens.
Best Practices for High-Tension Printing
✔ Use strong, rigid frames
Aluminum frames handle high-tension better than wooden frames.
✔ Track tension over mesh lifespan
Mesh relaxes after each run. Re-stretching extends screen life.
✔ Use consistent mesh quality
Inferior mesh loses tension quickly.
✔ Train operators
Consistent stretching = consistent printing.
Conclusion
High screen tension is one of the most powerful ways to improve print quality, reduce downtime, and dramatically increase production speed. Anatol’s pneumatic screen stretchers make it easy to achieve and maintain professional-level tension — whether you’re printing underbases, full-fronts, metallics, or high-detail graphics.
By combining proper stretching technique with high-tension best practices and with Anatol’s Screen Stretcher, your shop will see:
- Faster cycle times
- Sharper prints
- Less ink waste
- Fewer rejects
- Happier operators
- Longer stencil life
Ready to Upgrade Your Shop’s Screen Production?
Don’t wait—visit the Anatol Screen Stretcher page and submit a Get a Quote request today to streamline your stretching process and boost productivity!
Recent Articles
Optimize your screen printing darkroom with Anatol’s VOLT press and automatic coating machines. Learn screen reclamation best practices, determine the right number of screens, and boost efficiency. Streamline your setup to enhance print quality, reduce costs, and handle high-volume jobs effectively. Revolutionize your shop today!
November 21 2025
Read more

VOLT by Anatol — Supercharge Your Screen Printing, Save Time and Money.
Take back your time, cut your costs, and leave pneumatic problems behind for good.
November 17 2025
Read more

With Section 179 of the IRS tax code, you can deduct the total cost of qualified equipment you buy in 2025, up to $3,130,000 in total purchases. You can also take advantage of 40% bonus depreciation on both new and used equipment purchased in 2025. Act now before the year ends.
October 21 2025
Read more

Flashing is a critical step in the screen printing process, especially when working with multi-color designs or specialty inks. It refers to the process of briefly curing the ink between print strokes using a flash dryer.
October 1 2025
Read more
Screen printing, from ancient Chinese stencils to modern automated systems, blends tradition with innovation, creating vibrant, durable designs on various surfaces
September 29 2025
Read more
High density printing is a unique screen printing technique that creates bold, raised, and vibrant designs with a premium look. By applying thick layers of ink, it delivers long-lasting colors, tactile appeal, and eye-catching graphics. Discover how this method helps brands and designers produce unforgettable apparel with maximum visual impact.
September 19 2025
Read more
Discover how to boost your screen printing speed without sacrificing quality. From choosing the right equipment and inks to streamlining setup, curing, and team training, these practical tips help you achieve faster turnaround times while keeping prints sharp and professional.
September 9 2025
Read more
Anatol Automatic Screen Printing Presses: Save time, Energy, and Money For most screen printing shop owners, producing quality prints is the easy part. The real challenge is managing day-to-day operations, meeting business goals, and ensuring your company continues to grow. If your business feels stagnant, it might be time to take a hard look at […]
September 1 2025
Read more